
Greased Titles
Greased Titles is a Google Slides™ extension designed to make the more painful parts of managing supertitles (and creating closed captioning from titles decks) painless. It’s able to generate slides from a plain text file, create a corresponding text file from existing slides, and record a playthrough of the deck as a closed caption (SRT) file. This allows you to write your supertitles in any text editor, easily regenerate or edit existing titles, and quickly create timestamped closed caption files for your video recordings. See below for installation instructions and a few example uses, or the Tips & Help screen at the bottom of each of the three tools’ sidebars in Slides for full details.
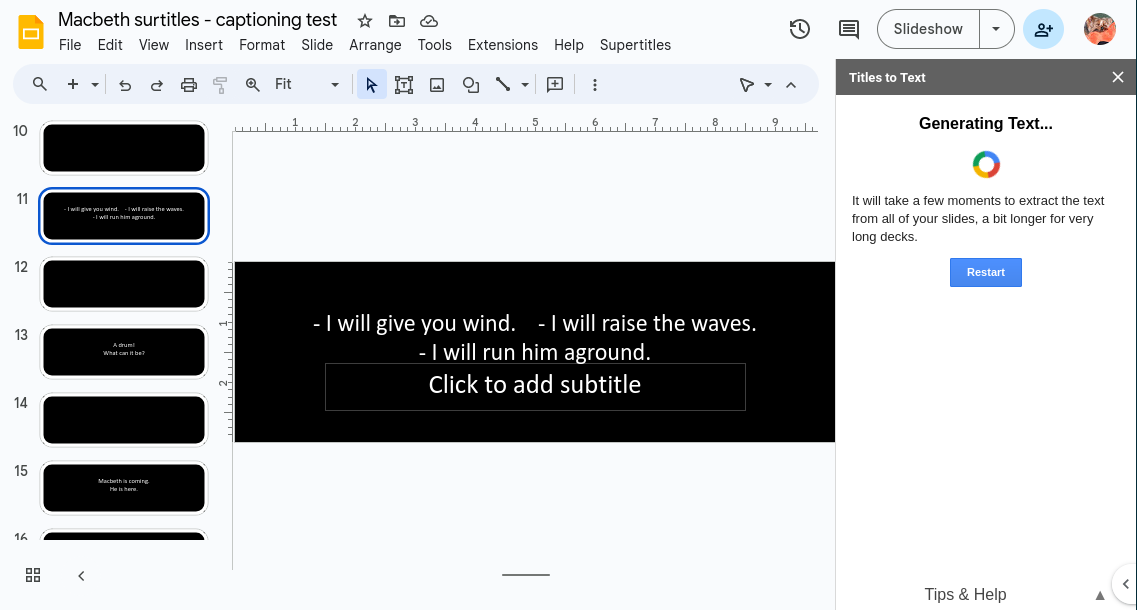
Generating an editable text file from slides.
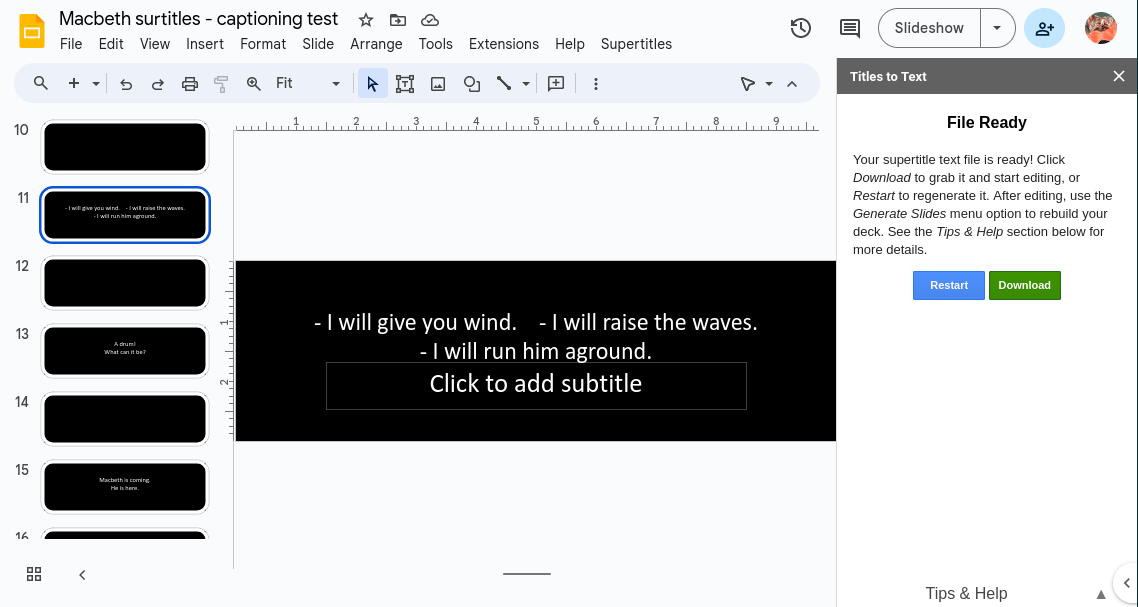
Editable file ready for download!
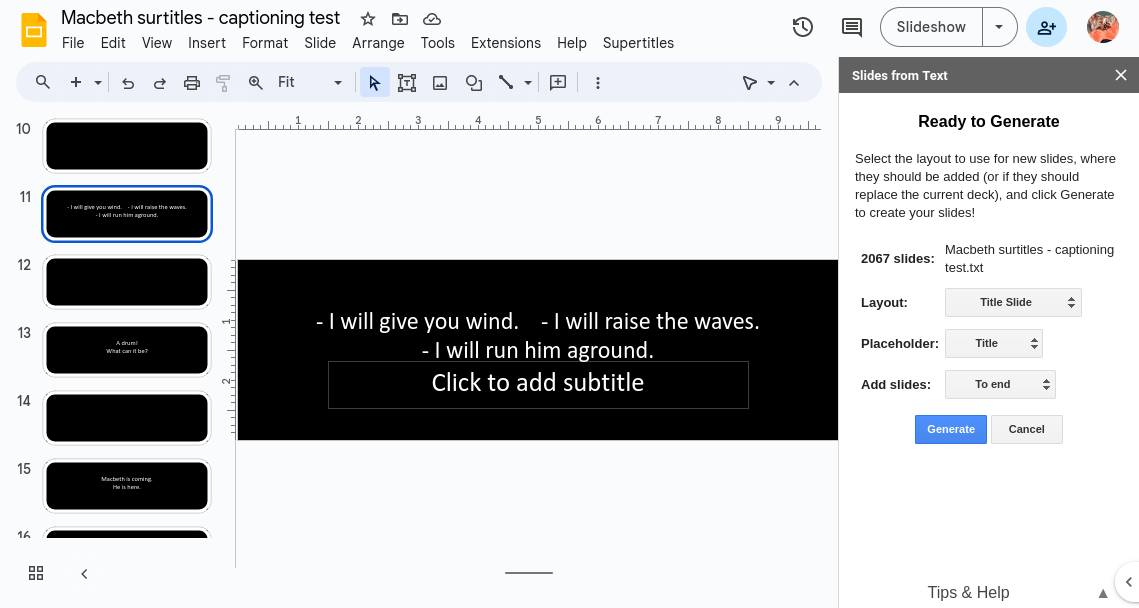
Configuring the options for creating slides from a text file.
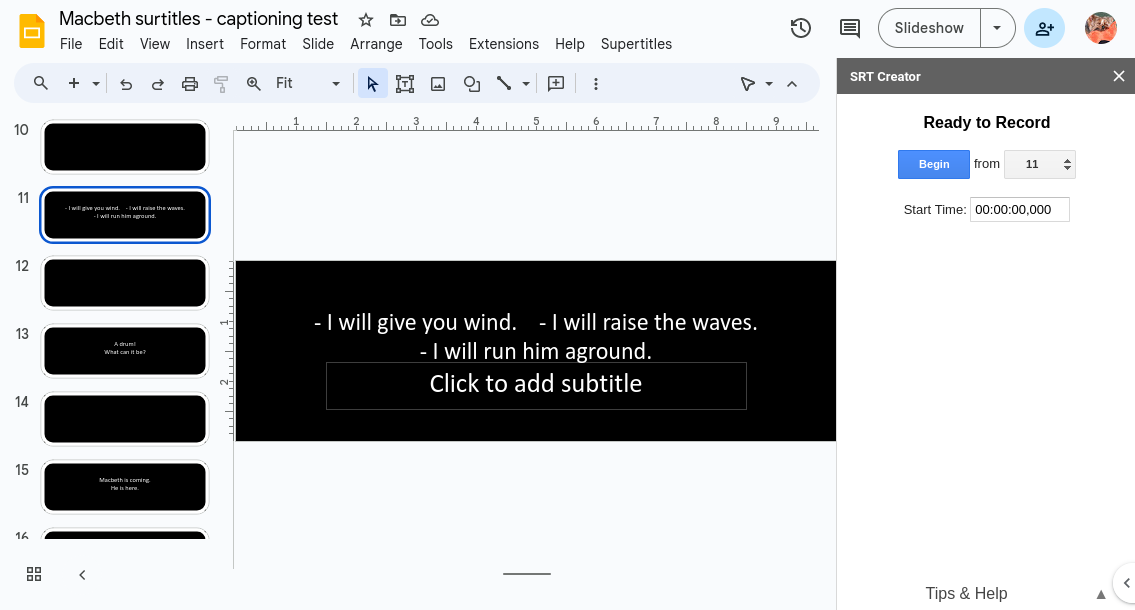
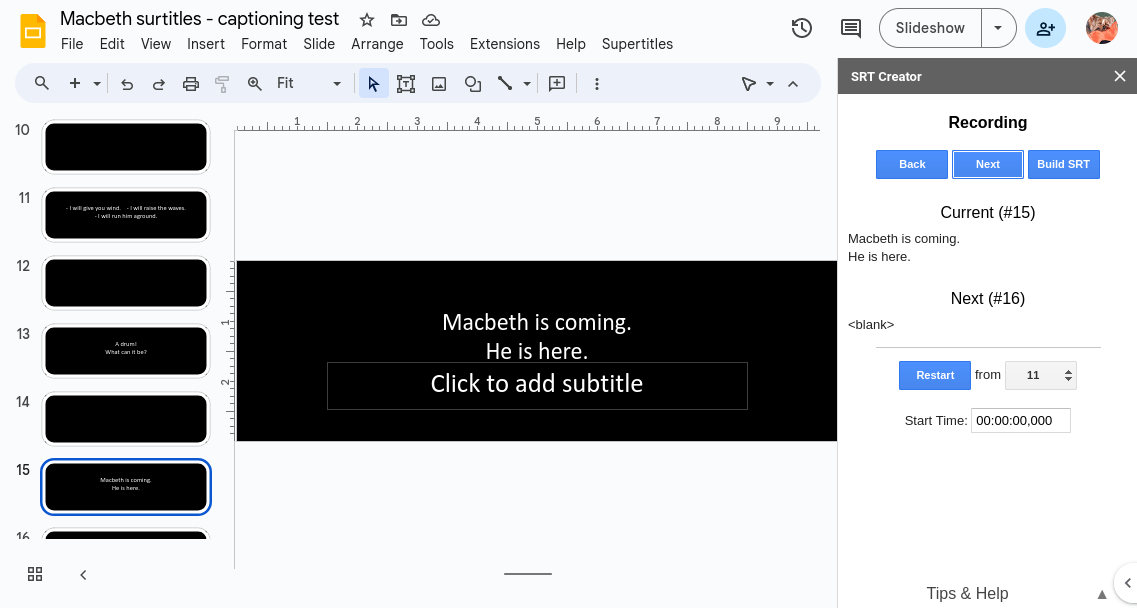
Beginning to record a closed-caption (SRT) file.
Recording of an SRT file in progress.
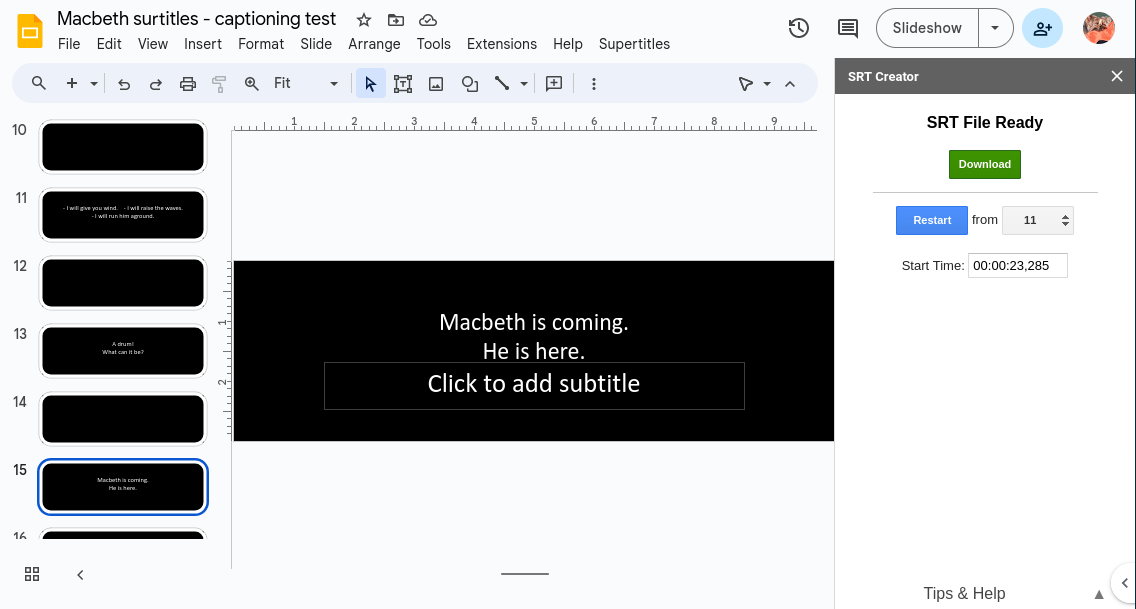
Closed caption file generated and ready for download!
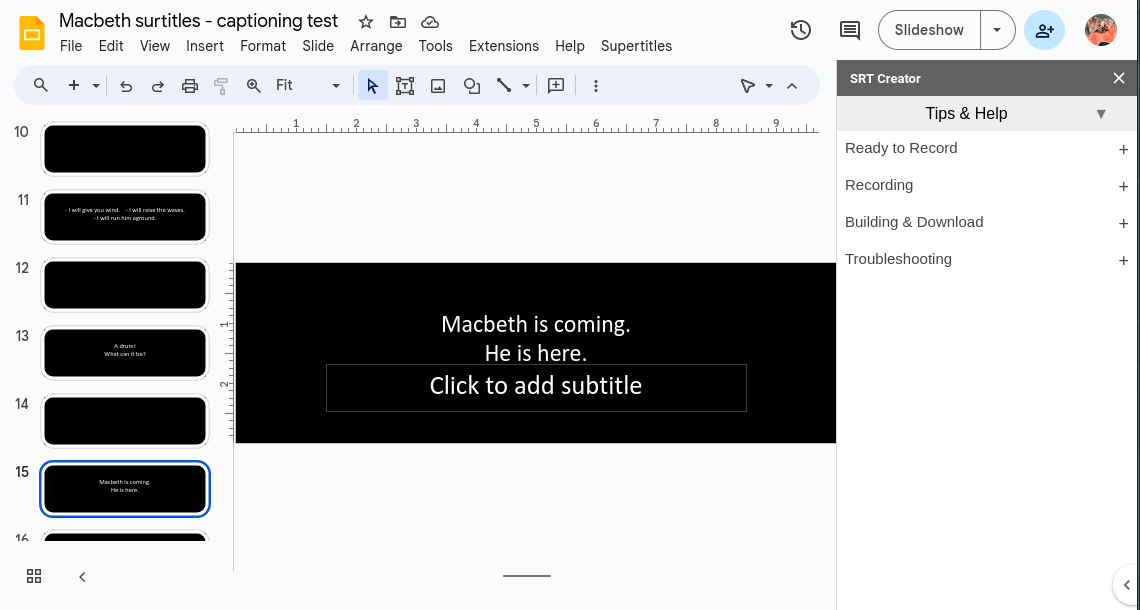
Documentation & troubleshooting information is built into each tool.
Installation
Because Greased Titles manipulates a slide deck, you’ll need to install it on each supertitle deck that you wish to work in. Never fear, though: it’s easy!
Open your existing supertitles deck, or create a blank new one.
Under the Extensions menu, click Add-ons, then Get Add-ons.
Search for Greased Titles (it should be the only result), and click on it.
Click Individual install.
…and that’s it! A Greased Titles submenu will be added to the Extensions menu. See the About & support entry for some more background, and the other options to begin working with your titles!
I want to…
…quickly create new supertitles from a libretto.
There are four steps to doing so:
Create a plain text file with your supertitles.
Create a blank Slides presentation & install Greased Titles (see Installation above).
Upload your text file to create your slides (Extensions > Greased Titles > Generate slides from text).
Edit the presentation’s theme to match your display needs (Slide > Edit theme).
The text file should be a series of title lines, with a blank line between slides. If you want a blank slide, use two blank lines between the neighboring slides. That’s pretty much it! See Plain text file format & editing in the Reference Material section at the end of this page for more details. You can edit the text file anywhere, and can start from an existing translation if you have a digital copy. If you’re working in a rich text editor such as Word or Google Docs™, you’ll need save the document as a plain text (often .txt) file before uploading it.
Table of Contents
I want to...
…make all the slides change when I edit the theme – half of them won’t!
…troubleshoot a problem or understand one of the tools better.
Reference Material
…make all the slides change when I edit the theme – half of them won’t!
In an ideal world, you can edit the supertitle deck’s theme to reposition or reformat the text on all slides in a single operation. Alas, the real world is rarely ideal: one of the pernicious problems with titles decks is that it’s easy for someone to slightly tweak individual slides (e.g. by moving the text box), which then removes those slides from the deck’s theme. Theme edits then only apply to some slides, which is… aggravating, at best, when you’re in the theater and trying to get everything perfectly aligned.
You can fix this problem by downloading your existing titles as a text file (Extensions > Greased Titles > Download titles as text), then immediately uploading them to the same deck (Extensions > Greased Titles > Generates slides from text). Depending on the options you select, this will replace your current deck, or append a new copy, all using the same theme. Please note: if your slides contain images, they will not be included, as it’s not possible to embed images in a plain text file. Note that if you have regrets, you can always use Ctrl+Z (or Edit > Undo) to undo any changes made by Greased Titles, as long as you keep the supertitle deck open.
…make significant edits to an existing supertitle deck.
This is pretty much the same as the answer above – just make your edits to the text file between downloading and uploading it. See Plain text file format & editing in the Reference Material section below for full details about the file format.
…create closed captions for a video.
This is pretty straightforward:
Create your supertitle deck & install Greased Titles (see above for instructions if you’re starting from scratch).
Start the tool: Extensions > Greased Titles > Record closed captions.
Cue up the video that you’re captioning however and wherever you want to play it back.
Pick your start slide in the sidebar and click Begin at the same time as you start the video. (There’s no connection between the video playback and Greased Titles: you’re simply watching it to get the slide timings correct.)
Use the Next button (or the down arrow or spacebar keys) to advance to the next slide as you reach the right point in the video.
Click Build SRT when you’re done, and download the file when prompted. The SRT can then be used with YouTube, Vimeo, FinalCut, etc. to add closed captions to your video file.
…and that’s all! See the Tips & Help section for this tool for quite a few more details, but that’s the gist of it!
…use a PowerPoint presentation.
No problem! Greased Titles is a Google Slides™ extension, so you’ll need to convert the PowerPoint to a Slides file:
Upload your PowerPoint to Drive.
In Drive, double-click a PowerPoint file: a preview of your file will open.
At the top, click Open with Google Slides.
Once it opens, click File > Save as Google Slides.
Install Greased Titles in the resulting file, and you’re off to the races!
…undo changes that Greased Titles made! I have regrets!
If you still have the supertitle deck open, you can always use Ctrl+Z (or Edit > Undo) to undo any changes made by Greased Titles. If you’ve closed the deck since you ran Greased Titles, you can use Slides’ version history to revert to an earlier version of the file.
…troubleshoot a problem or understand one of the tools better.
Start the tool in question (for instance, Extensions > Greased Titles > Generate slides from text), then click on Tips & Help at the bottom of the sidebar. Each tool has detailed documentation about each step in its process, as well as troubleshooting information.
…suggest a better name.
Please do! Email us at grease@resworks.org – we’re all ears!
Reference Material
Plain text file format & editing
The titles text file is formatted as a set of slides: each set of contiguous lines with text is a slide, with a blank line separating slides. A blank slide (or slides) is represented by an extra empty line (or lines). So, for instance (line numbers added for clarity):
Oh, my love!Whyfore art thou stage right?My props be here!Join me downstage with haste!And bring the MacGuffin!
...will generate 4 slides: one two-liner ("Oh, my love!..."), a one-liner ("My props..."), a blank slide (so stage-left has a chance to gasp), and then the "Join me..." two-liner. There is no limit on the number of lines per slide nor length per line, as that depends on your projection setup.
Plain text supertitles are fast and easy to edit for anyone, easy to create from an existing digital libretto, and allow the writer to focus on the content, rather than formatting. In combination, the Download titles as text and Generate slides from text tools can significantly speed up the creation & editing of supertitles.
To edit a titles file, open (or create) it as a text document in an appropriate editor (e.g. Notepad on Windows, TextEdit on Mac OS, or Emacs/Vim/Nano/etc. on Linux). Make your edits as you wish, then save it as an ASCII text file. All the editors above should do that automatically, except TextEdit. For TextEdit, select the Format menu and click on Make Plain Text before saving. You can also use rich text editors, such as Word or Google Docs™, but will need to export the document as plain text before uploading. Once you've made your changes, use the Extensions > Greased Titles > Generate Slides option to (re)create your slides.
Support the Project
This add-on is, and we pledge that it will remain, completely free to use, will never serve ads to you, and will never be monetized. If it's helpful to you, we kindly ask that you do one or more of:
Include Resonance Works in your program's special thanks section
...or make a tax-deductible donation to Resonance Works in an amount meaningful to you or your organization
...or drop us an email to let us know that it's helping you
...or just send some good vibes our way!
Technical Support & Feature Requests
If the help files (see the bottom of each tool's panel) aren't enough to resolve your problem, please drop us an email with the following information:
A description of what's not working.
The text (or, better yet, a screenshot) of any errors or oddities.
What OS and browser (and ideally what browser version) you're using (e.g. Chrome on Mac OS, Firefox on Windows, Safari, etc.).
If you're allowed, please share either your presentation or your captions text file (as appropriate to your problem) with grease@resworks.org to make it easier for us to debug. You can share it view-only: we'll make a copy as we work to replicate your problem, then delete it once the issue is resolved.
If you have ideas for how this might be improved or extended, please let us know! We'd love to hear from you!
All of the above said, please understand that this is a side (and volunteer) project, and we're pretty busy during the season producing opera, orchestral, and choral performances, so it might take a bit to solve problems or make improvements.